
My system battery status shows as battery "bad," what should I do?
This article details the different battery status report conditions and when to clear the health odometer.
Product applicability
The following products are discussed in this article:
- Legacy: R920, R247-E
- E Series: R920-E, R829-E, R820-E, and R247-E
- F Series: R920-F, R829-F, R820-F, and R247-F
- G Series (solar only): SC315-G, R829-G, R820-G, and R247-G
Refer to the video below for information and the procedure on clearing the health odometer after replacing the battery or batteries in your system.
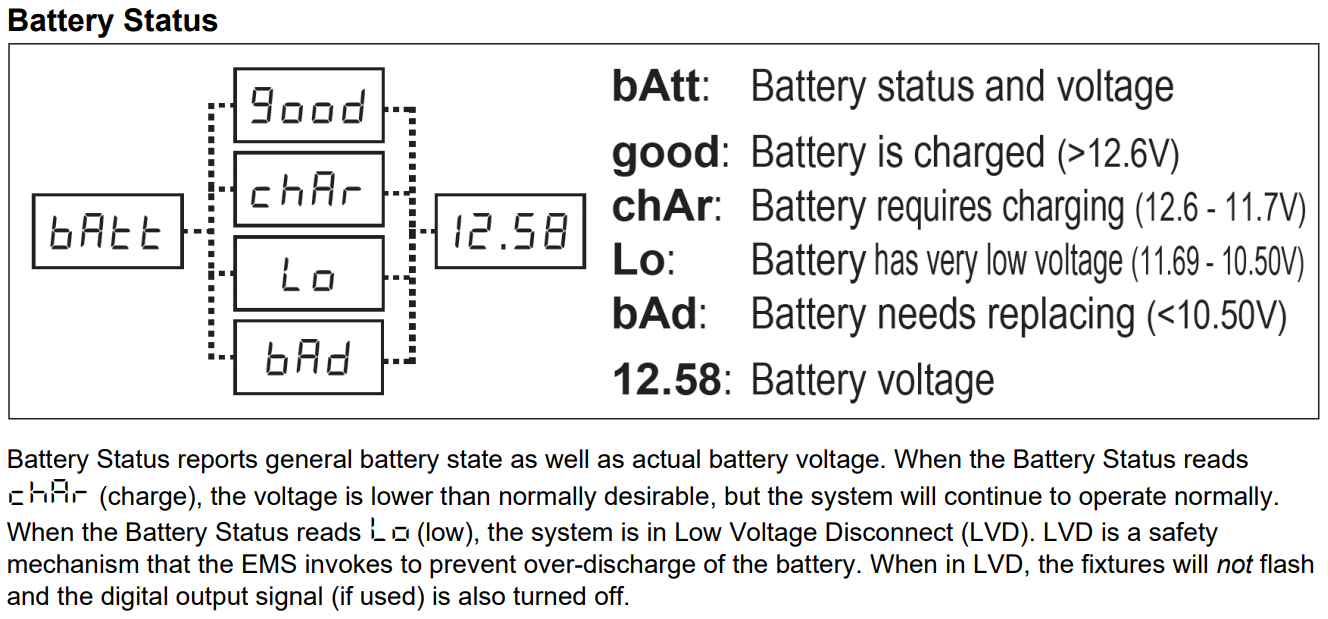
Battery Status
The general health of the battery is tracked by the system's “odometer.” If the battery status is reported as "bad," the odometer has determined the battery's health is too poor to operate reliably and should therefore be replaced. Battery health is evaluated by considering things like the total number of charge and discharge cycles, and the amount of time spent in a low state of charge.
When the system’s batteries require replacement, it is recommended that the original manufacturer and model of batteries be used. Always replace both batteries at the same time, if applicable.
| E/F Series Odometer Reset |
The odometer is reset by powering up the Energy Management System (EMS) while the "SET" button is pressed and held down using the following procedure:
|
|---|---|
| G Series Odometer Reset |
The odometer is reset by powering up the system while the "SET" button is pressed using the following procedure:
|
The battery health meter inside the system is now reset (i.e. it knows that new, healthy batteries have been installed). The battery status should read 9OOd (good) if the new batteries are 12.6V or higher, or char (charge) if they are between 11.7 and 12.6 volts.